What to Expect During a Roof Replacement: Step-by-Step Process
You know that sound—the sudden, deafening roar of a tropical downpour hitting your roof at 3 AM.
For most homeowners in the Klang Valley, that noise is just background music until a brown stain spreads across the ceiling.
We see this scenario constantly at Roofing Man.
The panic sets in, followed by the realization that a patch job won’t cut it anymore.
A full roof replacement feels like a massive undertaking, and honestly, it is.
But the anxiety usually comes from not knowing what happens once the scaffolding goes up.
From what we’ve seen, the difference between a nightmare project and a smooth one is simply knowing the plan.
This guide breaks down the exact process we follow, the local permit realities most contractors skip, and how to keep your home livable while we work above your head.
Before Work Begins
The Modern Inspection
Gone are the days when a contractor just climbs a ladder and squints at your tiles.
We use drone technology to map out the entire roof surface without risking damage to brittle, aging tiles.
This aerial view helps us spot hidden issues like cracked ridge caps or sagging trusses that are invisible from the ground.
A proper inspection must cover:
- Thermal Leaks: Identifying water retention in insulation using thermal imaging.
- Structural Integrity: Checking the wooden rafters for termite damage (very common in older PJ terrace houses).
- Access Logistics: Determining where the RoRo (Roll-on Roll-off) bin will sit.
Decoding the Quote
You should never accept a lump sum figure written on the back of a napkin.
Our quotes break down every cost, including the specific brand of tiles (e.g., Monier or GCI) and the gauge of the steel battens.
Watch out for hidden costs. Many contractors leave out the local council permit fees (like MBPJ or DBKL) for waste bins.
If a contractor places a massive bin on the roadside without a permit, you are the one liable for the fine.
Preparation Steps
Getting your home ready is just as important as the work we do.
Inside your home:
- Cover the Water Tank: In many Malaysian homes, the tangki air (water tank) sits in the roof space. You must seal it with plastic to prevent dust and debris from falling into your water supply.
- Protect the Attic: Dust will filter down through light fixtures and manholes.
- Secure Wall Hangings: Vibration from hammering can knock photos off walls.
Outside your home:
- Car Management: Park your vehicles at a neighbor’s house or down the street to avoid flat tires from stray nails.
- Air Cond Compressors: Cover external units with plywood to protect them from falling debris.

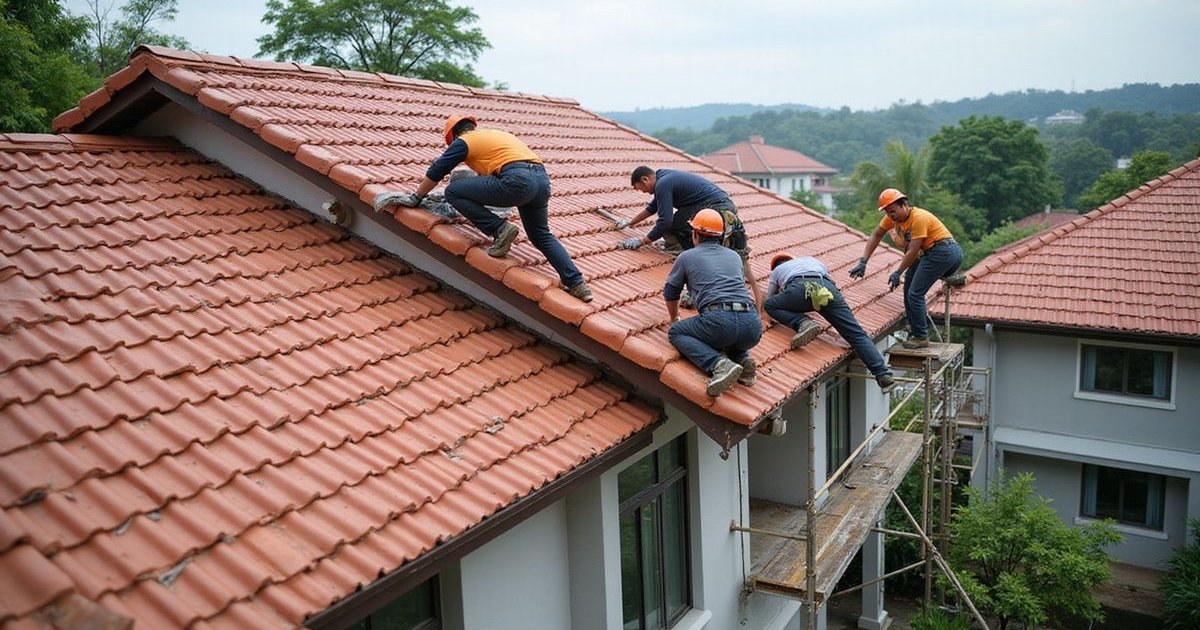
The Replacement Process
Day 1: Demolition and Safety
Morning - Site Setup: We start early, usually around 8:30 AM, to beat the afternoon heat.
Safety harnesses are rigged immediately—this is non-negotiable for professional teams.
Mid-Day - The Tear Down: The crew strips the old tiles and battens.
This is the noisiest part of the entire project, often exceeding 90 decibels.
We load the old materials directly into the RoRo bin to keep the site clean.
Critical Step: The Water-Test: Once the timber structure is exposed, we check for rot.
Replacing a roof over rotten wood is a waste of money, so we swap out any compromised rafters immediately.
Day 2-3: The New System
Insulation Upgrade: This is your best chance to cool down your house.
We recommend installing premium bubble foil insulation, like RadenShield or CoolMax.
These reflective barriers bounce radiant heat away from your house, unlike old-school wool which eventually absorbs heat.
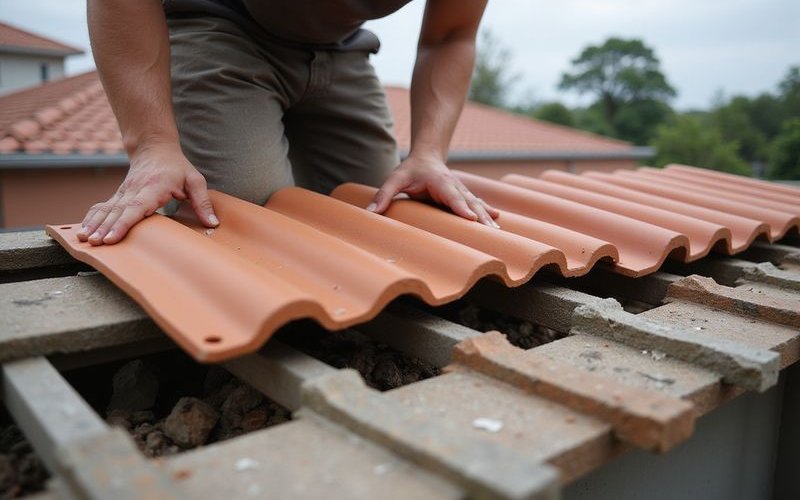
Material Installation: The new tiles go on next.
Here is how the top three material choices in Malaysia compare:
| Feature | Clay Tiles (Monier/GCI) | Concrete Tiles | Metal Deck (Zinc/Aluminium) |
|---|---|---|---|
| Cost (Terrace) | RM 25k - 35k | RM 18k - 25k | RM 15k - 20k |
| Heat Reduction | Excellent (Natural cooling) | Good | Poor (Needs heavy insulation) |
| Rain Noise | Silent | Silent | Loud (Ping sound) |
| Lifespan | 50+ Years | 30-40 Years | 15-20 Years |
Flashing and Waterproofing: The number one cause of leaks isn’t the tiles; it’s the flashing.
We install new metal flashing at every wall junction and valley.
Using high-grade sealant here ensures water flows into the gutter, not your ceiling.
Final Day: The details
Ridge and Hip Caps: These cap the peaks of your roof and are cemented in place.
We ensure the cement mix is water-repellent to prevent cracking over time.
The Magnetic Sweep: This is a step many skip.
Our team runs a high-powered magnet over your driveway and garden to pick up any nails that missed the tarps.
Final Handover: We walk you through the work, show you the warranty documents, and explain maintenance.
Timeline Expectations
Malaysia’s weather dictates our schedule.
We always buffer our timelines to account for the “4 PM Thunderstorm” phenomenon common in the Klang Valley.
Typical durations:
- Small Terrace (20 x 70): 3-4 Days
- Corner Lot / Semi-D: 5-6 Days
- Bungalow: 7-10 Days
The Monsoon Factor: Avoid scheduling major roof works during the peak monsoon months (October to December) if possible.
If you have an emergency during these months, we use heavy-duty canvas tarps to seal the roof instantly if rain clouds gather.
Living Through the Renovation
You can stay home, but you need to adjust your routine.
Manageable inconveniences:
- Noise: It will be loud from 9 AM to 5 PM.
- Dust: Fine dust finds its way everywhere; keep doors closed.
- Heat: With the roof open or insulation temporarily removed, your house will be warmer during the day.
When to leave: If you have infants, night-shift workers, or elderly parents sensitive to heat and noise, booking a hotel for the first two days (demolition phase) is a smart move.
Questions to Ask Your Contractor
“Do you handle the RoRo bin permit?” If they say “no need,” be careful.
Local councils like MBPJ and DBKL are strict about dumpsters on public roads.
“What brand of underlayment do you use?” Generic foil tears easily.
Look for reputable names that offer a tear-proof guarantee.
“Who is the site supervisor?” You need one point of contact, not a group of workers who might not speak your language fluently.
Red Flags During the Process
No Safety Gear: If workers are walking on a steep roof without harnesses, stop the work.
It is a massive liability risk for you as the homeowner.
Asking for Full Payment Upfront: A standard deposit is normal (usually 30-40%), but paying 100% before work starts is dangerous.
Reusing Old Flashing: Some contractors try to save money by keeping the old metal flashing.
This is the “weakest link” and will likely leak within a year.
After Your New Roof
The First Rain Test: Don’t panic if you hear settling noises; that is just the materials adjusting to temperature changes.
Check your attic space during the first heavy storm to ensure the valley gutters are handling the volume.
Maintenance:
- Gutters: Clean them every 6 months to prevent backflow.
- Overhanging Trees: Trim branches that touch the roof to stop squirrels from damaging your new tiles.
Conclusion
A roof replacement is a significant project, but knowing what to expect makes the process smoother.
Choose a contractor who communicates clearly, follows a systematic process, and stands behind their work.
At Roofing Man, we guide homeowners through every step of the replacement process.
Call us at 016-699 9077 for a free assessment and detailed quote.